Showing posts with label Sewing. Show all posts

Monday, January 30, 2012

Grocery Sack Holder

A couple months ago I had a very stinky problem in my daughter's room.  I cloth diaper my baby girl, which is great, and I certainly wouldn't do it any other way, but it does cause a slight complication in the poop arena.  Luckily, there is a wonderful thing called a diaper liner.  This magical invention is placed between the diaper and the cute baby tush to catch the "yuckies".  You can either flush the liner and its contents or toss it in the trash.  I don't really trust the plumbing in our old house so that leaves to tossing the liner.  This is where the stinky problem lies.  I always have tons of grocery sacks lying so this provides an opportunity to reuse them, but its certainly not safe to have plastic sacks floating around in a baby's room.  This is where my project began.  Keep in mind that I didn't really measure anything, I just worked with what I had.

You will need:

  • A rectangle piece of fabric (whatever size you want--this will depend on how big you would like it)
  • Ribbon (cut a couple inches longer than the length of the rectangle)
  • 1/4" elastic (cut AFTER sewn in)

Along the length of the rectangle that you want to be the top, lay your ribbon down so you can fold the edge of fabric over and it will extend past the ribbon.  This should allow room for the ribbon (which will act as a drawstring) and a decent amount of seam allowance.  Mark the fabric so you know where to pull the edge to.  Oh and raw edges of fabric don't matter on this one :)
Pull the edge over to the pencil marking and sew, making sure their is enough space for the ribbon.
Once sewn, thread the ribbon through the "sleeve" you created.  My ribbon was pretty stiff and easy to pull through.  You can also attach a safety pin to the end of the ribbon and guide it through the sleeve.  Or you can use the technique I used in the next step.
Do the same on the opposite edge of fabric using the elastic instead of the ribbon (remember to not cut the elastic yet).  This time pin the fabric into place with elastic still there.
When sewing, make sure not to sew over the elastic.
This is where the gathering is created.  Sew one edge of the elastic in place.  Once secure, pull the elastic to the tightness you want, gathering the fabric along with it.  Pin and sew that edge of the elastic.  Now you can cut the elastic.
Pin the raw edges together.  Tuck in the edges around the ribbon.  Once that is done, sew the edge but be sure not to sew over the ribbon.
Once that's done you have a grocery sack holder, wasn't that easy?
Just stuff and pull the drawstring shut.  I hung mine on the wall above my daughter's changing table.

**Just a safety note:  If you are using this in an application like mine, make sure the bag is out of your child's reach.

Saturday, October 15, 2011

Cupcake Fairy Costume: Part 2: Tutu

The next part of the Cupcake Fairy costume is a tutu.  What could be cuter than a tutu on a little girl? 
I didn't want this tutu to be too poofy because my baby is only 4 months old and we will be holding her all night.  The more "stuff" a baby has on the more difficult it is to hold her.


Materials Needed:
  • 1/2 elastic
  • tulle (amount depends on how full and how many layers you want it to be)
  • ribbon
Measure the waist of one cute baby (or child)!  My little girl is about 17 inches.
Cut a piece of elastic about 1 inch longer than your your baby's waist, in my case I needed about 18 inches.
Then cut tulle to your desired length.  I like the end of the skirt to hit just above the knee.  The width of the tulle should be the same length as the elastic when it is stretched out as far as it will go.
To cut tulle:  roll it up then just cut with fabric scissors.  I cut 4 pieces of tulle, 2 in light pink and 2 in bright pink.

Layer all the pieces of tulle together.  Tulle can be very hard to work with so I pinned it down to a towel (you can also use an ironing board).  Pin down one layer at a time, building on top of each other.
A helper is needed for this next part.  This lucky winner is my sister Tiffany.  One of you should stretch the elastic across to the pinned tulle while the other pins the elastic to the tulle.  Start at the center and pin the elastic to the tulle.  Unpin the tulle from the towel everywhere but the very ends.  Once all the tulle and elastic are pinned, completely unpin the tulle from the towel.
Sew the elastic to the tulle by stretching the elastic while sewing.  Stretching the elastic allows for the waistband to stretch.  If you don't stretch the elastic during sewing, the thread will be to tight and snap when you stretch the band.
Pin the edges of the tulle together with right sides facing.  Sew one inch in.
Do an extra zig-zag stitch over the elastic band to reinforce it.  Then trim the excess material to about a half an inch and sew open the seam.

The next step is to make a bow.  Now the length of ribbon that you need will depend on how big a bow you want.  Loop the ribbon around back and forth until you get two loops and hanging ribbon on each side.  Clamp slightly off center with an alligator clip then adjust the bow loops.
Take a piece of heavy string or yarn and tie a not around the center of the bow.
This is what the right side looks like so far.
Take a smaller piece of ribbon and tie a simple not.
Trim up the knotted ribbon and twist the ends around so the right side of the ribbon is out.
Using a glue gun, dot some glue on the front of the bow and place the knot on top.  Turn it over.
Put some glue on this side of the bow and glue down one side of the ribbon.  Trim it up and glue down the other side and trip that end up.  You don't want the ribbon to show through onto the other side.
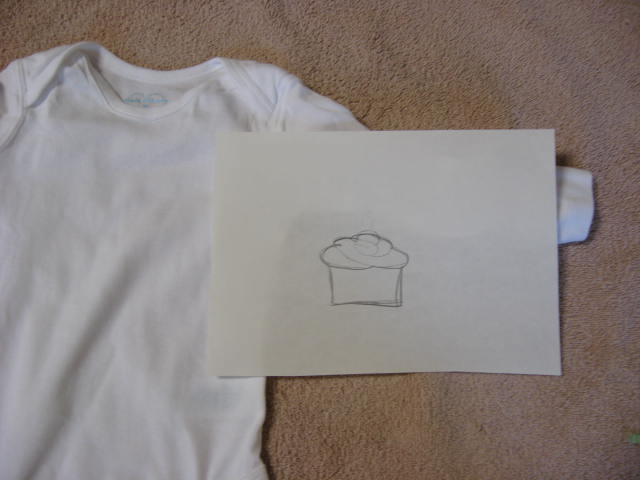
Now you have a beautiful bow!  Mine matches the cupcake on the onsie.
Hand stitch the bow to the skirt on whichever side you want.
So cute and a perfect combination with her Cupcake Appliqued Onsie!


Part 3 of the Cupcake Fairy Costume is my favorite... Fairy Wings!  I will be posting about it within the next couple of days.

Cupcake Fairy Costume: Part 1: Appliqued Onsie


Coming up with a costume for your precious baby girl is so difficult!  One day I saw the most adorable cupcake costume when I was at Old Navy with my best friend.  Seriously, I was in love with the idea of carrying around a puffy cupcake.  Cupcakes have kind of been my thing lately.  They are so cute and colorful!

Anyway, I decided that it was important to me to make her costume.  While at the fabric store with my sister Tiffany one day, looking for costume inspiration for our kids, I finally came up with the idea of a  fairy.  I don't remember why or how it came to mind but it sounded adorable.  Her fairy costume needed some sort of theme...cupcakes!  It was perfect; I would make her a Cupcake Fairy.  Brilliant!

Part 1:  Appliqued Onsie

Materials:
  • onsie
  • fabric scraps
  • fusible interfacing
  • matching (or contrasting) thread
  • scrap paper

Start off with a clean pressed onsie.  I chose to use a long sleeved onsie because it will be chilly on Halloween.
Sketch out the design you would like to apply to the onsie.  I tend to do things way too big, so I compared my sketch size to the onsie.  Perfect.  Nothing is sadder when you spend hours applying a fabric flower you made to a onsie to bring your newborn home in just to find when you put it on her and the flower is WAY too big.
Use a couple scraps of fabric. Make sure the fabric piece is big enough for the design and then some.  Iron on fusible interfacing to the wrong of the fabric.  This will help prevent it from wrinkling during the sewing.
To iron on the fusible interfacing:  cut the interfacing just smaller than the piece of fabric.  Lay the interfacing down, bumpy side up.  Put the fabric on top with the wrong side against the interfacing. Iron on high heat for a few seconds.

Cut the sketch out, then cut again to separate the pieces that will require different fabrics.
Sketch onto the wrong side (or the interfacing side) of the fabric and cut out the pieces.
Place the pieces onto the fabric to figure out positioning and placement.  Then pin the applique pieces together. (After placing the two cupcake pieces onto the onsie, I decided it needed the cherry.)
Do quick a quick stitch across the pieces to hold in place. The stitches will be covered by the next step.
Now here is where I wish I would have done something a little different.  Notice how the onsie is a bit wrinkled around the cupcake?  Well, I should have put interfacing on the inside of the onsie to help keep this finicky knit material in place.  Live and learn!

Position and pin the applique to the onsie.  Using a sewing machine, do a zig-zag stitch around all of the applique pieces.
And the appliqued onsie (Step 1) is complete!  Step 2 will follow soon.